Quick Start
Supported Browsers
NVIDIA Air fully supports the following browsers:
- Google Chrome 120 or later
- Mozilla Firefox 121 or later
NVIDIA Air supports the following browsers on a best-effort basis:
- Microsoft Edge
- Safari
Log in to Air
To log in, go to air.nvidia.com. Enter your business email address, then click Next.

If your email address is not accepted as a valid business email address, and you think this is an error, contact air-support@nvidia.com.
Network Simulations
After you log in, Air displays a list of simulations associated with your account.
Create a Simulation
To create a simulation, you can either:
- Build a custom topology; see Custom Topology.
- Load a pre-configured demo from the Demo Marketplace and customize it; see Pre-Built Demos.
Navigate Simulations
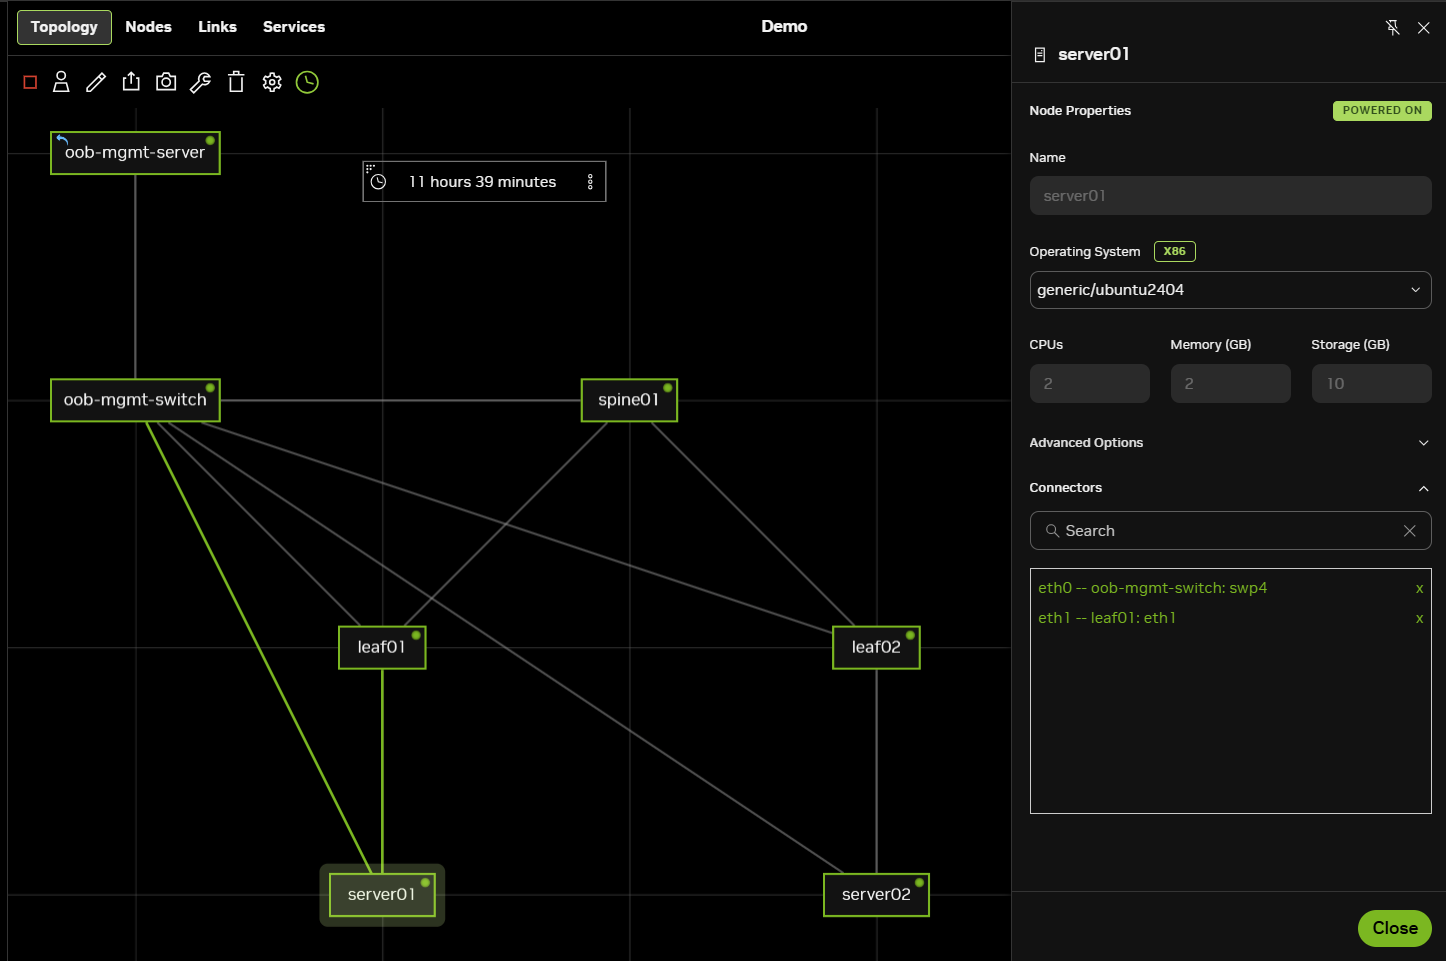
To interact with your simulation, select the Topology tab. This tab provides a variety of options, including options to start and stop the simulation, share it with other users, export it as a JSON file, and ways to access additional features.

Nodes and Consoles
Select a node to open a side panel that displays the node’s properties, including its operating system, number of CPUs, memory and storage capacities, and connectors.

Double-click any node to connect to its console.

Services
Enable services to create external connections to your simulation to support integrations: for example, you can use your preferred SSH client to access the oob-mgmt-server, run and access web applications such as Grafana or Kibana, or configure SNMP polling.
To add a new service to your simulation:
- In a loaded simulation, select Services > New Service.

- Enter the following information to create a service:
- Service Name is the name for your service. After you name a service, you can choose to run multiple instances of the same service on different interfaces or ports.
- Interface is where the connection terminates; typically
eth0on theoob-mgmt-server. - Service Type is the service type. NVIDIA Air creates a hyperlink to the URL automatically in the services panel for SSH, HTTP, or HTTPS services. For Other services, you can use any port, but Air does not generate a hyperlink. The hyperlink provides a convenient way to copy and paste the service if your browser supports it.
- Service Port is the internal port where the service terminates.
Click Create.
Air displays the information needed to access the service you created.

To enable SSH in the oob-mgmt-server, click Enable SSH. This option is only available when the out-of-band network is enabled. SSH password authentication is disabled on the oob-mgmt-server by default. To use SSH password authentication, you must upload SSH keys to your user profile; for more information, see SSH Keys.
Rebuild and Reset Nodes
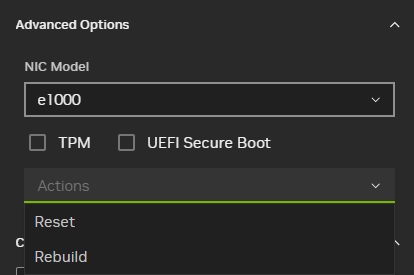
Rebuilding a node restores the node to its original or default configuration. If you create the node from a demo or other snapshot, rebuilding it reverts the node to its original configuration. Resetting a node performs a hard reboot to the node.
From a loaded simulation, select a node to view its node properties. Click Advanced Options > Actions to rebuild or reset the node.

You can also rebuild all nodes in a simulation simultaneously by clicking the  Rebuild All Nodes button in the Topology tab.
Edit Simulations
You can edit important attributes of a simulation with the  Edit button in the Topology tab.
- Name is the simulation name. Simulations can share the same name. Air assigns a unique identifier to each simulation to differentiate between each one.
- Organization is the organization assigned to the simulation. This attribute assigns the exact simulation to an organization. The simulation that is assigned to the organization is not a copy or clone of the simulation. This means that each user with appropriate permissions has access to the simulation and can edit it. For more information, refer to Organizations.
- Sleep date is when the simulation goes into sleep mode automatically; Air saves the state of the simulation and stores it to free up account resources.
- Expiration date is when Air deletes the simulation automatically.
Share Simulations
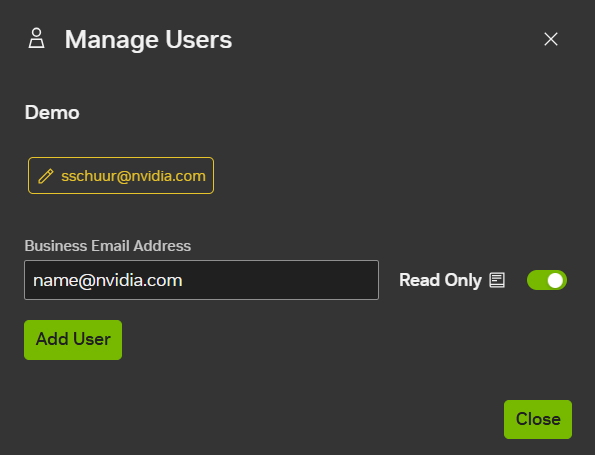
Sharing a simulation allows other users to view and interact with it. When sharing a simulation, you can choose to give users read-only access, which means they cannot modify the simulation (for example, by deleting it or assigning it to an organization). Users with read-only access have access to node consoles, where they can run commands to modify the simulation. To share a simulation with a group of users, see Organizations.
To share a simulation:
- From the Topology tab, click
 Manage Users.
 - Enter the email addresses of the users with whom you want to share the simulation.
- (Optional) Select Read Only to limit permissions to read-only access.
- Click Add User.
- Click Close.

Users can now view the simulation from their Simulations list. The user does not receive any notification that they have access to the simulation.
API Tokens
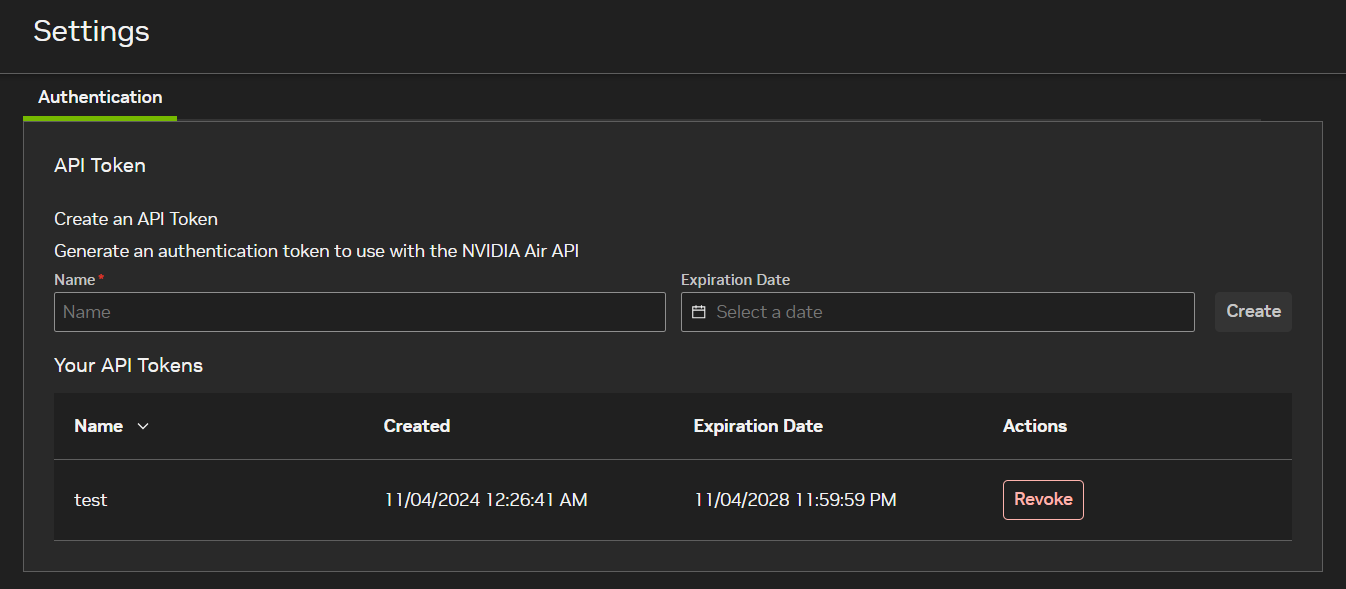
API tokens allow you to execute authenticated activities using the NVIDIA Air API or SDK. To view your API tokens, click your username in the UI and select Settings.
To generate an API token, fill in the Name and Expiration Date fields, then click Create. Save your token somewhere safe. You will not be able to view it again.

SSH Keys
To view your SSH keys, click your username in the UI and select Settings. To enable the SSH service on simulations, you must add SSH keys to your authentication settings. Any SSH keys that you add are included automatically in your simulation’s list of authorized keys under the oob-mgmt-server.
To add an SSH key, fill in the Name and Public Key fields, then select Add.

You can revoke or delete both API tokens and SSH keys if you no longer need them, or if they become compromised.
Resource Budgets
The number of simulation resources allotted to a user is tied to the user’s account. For an account using a valid business email, Air allocates the following resource budget:
- 60 vCPUs
- 90 GB memory
- 650 GB storage
- 4 running simulations
Air allocates NVIDIA employees the following resource budget:
- 100 vCPUs
- 100 GB memory
- 1 TB storage
- 5 running simulations
Organizations have the largest resource budgets and can accommodate large simulations. The default resource budget for an organization is:
- 300 vCPUs
- 300 GB memory
- 3 TB storage
- 10 GB image storage
- 15 running simulations
If you need to expand the resources for an organization beyond the default resource budget, contact the Air Support team at air-support@nvidia.com.