Install and Configure the NetQ Agent and CLI on RHEL and CentOS Servers
After installing your NetQ software, you can install the NetQ 3.3 Agent and CLI on each server you want to monitor. These can be installed on servers running:
- Red Hat RHEL 7.1
- CentOS 7
Prepare for NetQ Agent and CLI Installation on a RHEL or CentOS Server
For servers running RHEL or CentOS, you need to:
- Verify the minimum package versions are installed
- Verify the server is running lldpd
- Install and configure NTP, if needed
- Obtain NetQ software packages
If your network uses a proxy server for external connections, you should first configure a global proxy so apt-get can access the software package in the NVIDIA networking repository.
Verify Service Package Versions
Before you install the NetQ Agent and CLI on a Red Hat or CentOS server, make sure the following packages are installed and running these minimum versions:
- iproute-3.10.0-54.el7_2.1.x86_64
- lldpd-0.9.7-5.el7.x86_64
- ntp-4.2.6p5-25.el7.centos.2.x86_64
- ntpdate-4.2.6p5-25.el7.centos.2.x86_64
Verify the Server is Running lldpd and wget
Make sure you are running lldpd, not lldpad. CentOS does not include lldpd by default, nor does it include wget, which is required for the installation.
To install this package, run the following commands:
root@rhel7:~# sudo yum -y install epel-release
root@rhel7:~# sudo yum -y install lldpd
root@rhel7:~# sudo systemctl enable lldpd.service
root@rhel7:~# sudo systemctl start lldpd.service
root@rhel7:~# sudo yum install wget
Install and Configure NTP
If NTP is not already installed and configured, follow these steps:
-
Install NTP on the server. Servers must be in time synchronization with the NetQ Platform or NetQ Appliance to enable useful statistical analysis.
root@rhel7:~# sudo yum install ntp -
Configure the NTP server.
-
Open the
/etc/ntp.conffile in your text editor of choice. -
Under the Server section, specify the NTP server IP address or hostname.
-
-
Enable and start the NTP service.
root@rhel7:~# sudo systemctl enable ntp
root@rhel7:~# sudo systemctl start ntp
If you are running NTP in your out-of-band management network with VRF, specify the VRF (
ntp@<vrf-name>versus justntp) in the above commands. -
Verify NTP is operating correctly. Look for an asterisk (*) or a plus sign (+) that indicates the clock is synchronized.
root@rhel7:~# ntpq -pn
remote           refid            st t when poll reach   delay   offset  jitter
==============================================================================
+173.255.206.154 132.163.96.3     2 u   86  128  377   41.354    2.834   0.602
+12.167.151.2    198.148.79.209   3 u  103  128  377   13.395   -4.025   0.198
2a00:7600::41    .STEP.          16 u    - 1024    0    0.000    0.000   0.000
\*129.250.35.250 249.224.99.213   2 u  101  128  377   14.588   -0.299   0.243
Obtain NetQ Agent and CLI Package
To install the NetQ Agent you need to install netq-agent on each switch or host. To install the NetQ CLI you need to install netq-apps on each switch or host. These are available from the NVIDIA networking repository.
To obtain the NetQ packages:
-
Reference and update the local
yumrepository.root@rhel7:~# sudo rpm --import https://apps3.cumulusnetworks.com/setup/cumulus-apps-rpm.pubkey root@rhel7:~# sudo wget -O- https://apps3.cumulusnetworks.com/setup/cumulus-apps-rpm-el7.repo > /etc/yum.repos.d/cumulus-host-el.repo -
Edit
/etc/yum.repos.d/cumulus-host-el.repoto set theenabled=1flag for the two NetQ repositories.root@rhel7:~# vi /etc/yum.repos.d/cumulus-host-el.repo ... [cumulus-arch-netq-3.3] name=Cumulus netq packages baseurl=https://apps3.cumulusnetworks.com/repos/rpm/el/7/netq-3.3/$basearch gpgcheck=1 enabled=1 [cumulus-noarch-netq-3.3] name=Cumulus netq architecture-independent packages baseurl=https://apps3.cumulusnetworks.com/repos/rpm/el/7/netq-3.3/noarch gpgcheck=1 enabled=1 ...
Install NetQ Agent and CLI on a RHEL or CentOS Server
After completing the preparation steps, you can successfully install the NetQ Agent and CLI software onto your server.
To install the NetQ software:
-
Install the Bash completion and NetQ packages on the server.
root@rhel7:~# sudo yum -y install bash-completion root@rhel7:~# sudo yum install netq-agent netq-apps -
Verify you have the correct version of the Agent.
You should see version 3.3.1 and update 33 in the results. For example:root@rhel7:~# rpm -q -netq-agent- netq-agent-3.3.1-rh7u33~1614768254.886b337.x86_64.rpm
root@rhel7:~# rpm -q -netq-apps
You should see version 3.3.1 and update 33 in the results. For example:
- netq-apps-3.3.1-rh7u33~1614768254.886b337.x86_64.rpm
-
Restart
rsyslogso log files are sent to the correct destination.root@rhel7:~# sudo systemctl restart rsyslog -
Continue with NetQ Agent and CLI Configuration in the next section.
Configure the NetQ Agent and CLI on a RHEL or CentOS Server
After the NetQ Agent and CLI have been installed on the servers you want to monitor, the NetQ Agents must be configured to obtain useful and relevant data.
The NetQ Agent is aware of and communicates through the designated VRF. If you do not specify one, the default VRF (named default) is used. If you later change the VRF configured for the NetQ Agent (using a lifecycle management configuration profile, for example), you might cause the NetQ Agent to lose communication.
Two methods are available for configuring a NetQ Agent:
- Edit the configuration file on the device, or
- Use the NetQ CLI.
Configure the NetQ Agents Using a Configuration File
You can configure the NetQ Agent and CLI in the netq.yml configuration file contained in the /etc/netq/ directory.
-
Open the
netq.ymlfile using your text editor of choice. For example:root@rhel7:~# sudo nano /etc/netq/netq.yml -
Locate the netq-agent section, or add it.
-
Set the parameters for the agent as follows:
- port: 31980 (default) or one that you specify
- server: IP address of the NetQ server or appliance where the agent should send its collected data
- vrf: default (default) or one that you specify
Your configuration should be similar to this:
netq-agent:
port: 31980
server: 127.0.0.1
vrf: default
Locate the netq-cli section, or add it.
-
Set the parameters for the CLI based on your deployment type.
Specify the following parameters:
- netq-user: User who can access the CLI
- server: IP address of the NetQ server or NetQ Appliance
- port (default): 32708
Your YAML configuration file should be similar to this:netq-cli: netq-user: admin@company.com port: 32708 server: 192.168.0.254Specify the following parameters:
- netq-user: User who can access the CLI
- server: api.netq.cumulusnetworks.com
- port (default): 443
- premises: Name of premises you want to query
Your YAML configuration file should be similar to this:netq-cli: netq-user: admin@company.com port: 443 premises: datacenterwest server: api.netq.cumulusnetworks.com
Configure NetQ Agent adn CLI Using the NetQ CLI
If the CLI is configured, you can use it to configure the NetQ Agent to send telemetry data to the NetQ Server or Appliance.
If you intend to use VRF, skip to Configure the Agent to Use VRF. If you intend to specify a port for communication, skip to Configure the Agent to Communicate over a Specific Port.
Use the following command to configure the NetQ Agent:
netq config add agent server <text-opta-ip> [port <text-opta-port>] [vrf <text-vrf-name>]
This example uses an IP address of 192.168.1.254 and the default port and VRF for the NetQ hardware.
root@rhel7:~# sudo netq config add agent server 192.168.1.254
Updated agent server 192.168.1.254 vrf default. Please restart netq-agent (netq config restart agent).
root@rhel7:~# sudo netq config restart agent
The steps to configure the CLI are different depending on whether the NetQ software has been installed for an on-premises or cloud deployment. Follow the instructions for your deployment type.
Use the following command to configure the CLI:
netq config add cli server <text-gateway-dest> [vrf <text-vrf-name>] [port <text-gateway-port>]
Restart the CLI afterward to activate the configuration.
This example uses an IP address of 192.168.1.0 and the default port and VRF.
root@rhel7:~# sudo netq config add cli server 192.168.1.0
root@rhel7:~# sudo netq config restart cli
If you have a server cluster deployed, use the IP address of the master server.
To access and configure the CLI on your NetQ Platform or NetQ Cloud Appliance, you must have your username and password to access the NetQ UI to generate AuthKeys. These keys provide authorized access (access key) and user authentication (secret key). Your credentials and NetQ Cloud addresses were provided by NVIDIA via an email titled Welcome to Cumulus NetQ!.
To generate AuthKeys:
-
In your Internet browser, enter netq.cumulusnetworks.com into the address field to open the NetQ UI login page.
-
Enter your username and password.
-
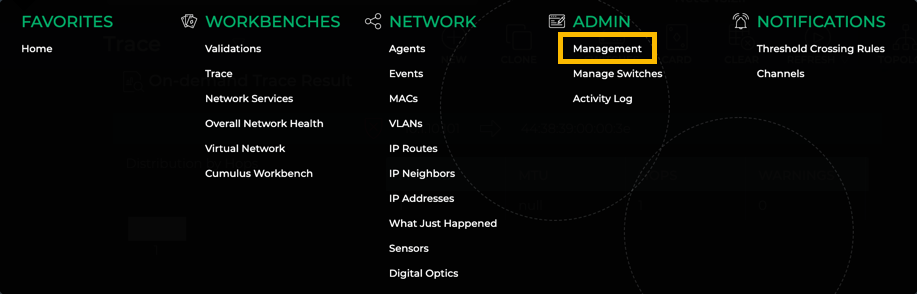
From the Main Menu, select Management in the Admin column.
-
Click Manage on the User Accounts card.
-
Select your user and click
 above the table.
 -
Copy these keys to a safe place.
The secret key is only shown once. If you do not copy these, you will need to regenerate them and reconfigure CLI access.
You can also save these keys to a YAML file for easy reference, and to avoid having to type or copy the key values. You can:
- store the file wherever you like, for example in /home/cumulus/ or /etc/netq
- name the file whatever you like, for example credentials.yml, creds.yml, or keys.yml
BUT, the file must have the following format:
access-key: <user-access-key-value-here>
secret-key: <user-secret-key-value-here>
-
Now that you have your AuthKeys, use the following command to configure the CLI:
netq config add cli server <text-gateway-dest> [access-key <text-access-key> secret-key <text-secret-key> premises <text-premises-name> | cli-keys-file <text-key-file> premises <text-premises-name>] [vrf <text-vrf-name>] [port <text-gateway-port>] -
Restart the CLI afterward to activate the configuration.
This example uses the individual access key, a premises of datacenterwest, and the default Cloud address, port and VRF. Be sure to replace the key values with your generated keys if you are using this example on your server.
root@rhel7:~# sudo netq config add cli server api.netq.cumulusnetworks.com access-key 123452d9bc2850a1726f55534279dd3c8b3ec55e8b25144d4739dfddabe8149e secret-key /vAGywae2E4xVZg8F+HtS6h6yHliZbBP6HXU3J98765= premises datacenterwest
Successfully logged into NetQ cloud at api.netq.cumulusnetworks.com:443
Updated cli server api.netq.cumulusnetworks.com vrf default port 443. Please restart netqd (netq config restart cli)

root@rhel7:~# sudo netq config restart cli
Restarting NetQ CLI... Success!
This example uses an optional keys file. Be sure to replace the keys filename and path with the full path and name of your keys file, and the datacenterwest premises name with your premises name if you are using this example on your server.
root@rhel7:~# sudo netq config add cli server api.netq.cumulusnetworks.com cli-keys-file /home/netq/nq-cld-creds.yml premises datacenterwest
Successfully logged into NetQ cloud at api.netq.cumulusnetworks.com:443
Updated cli server api.netq.cumulusnetworks.com vrf default port 443. Please restart netqd (netq config restart cli)

root@rhel7:~# sudo netq config restart cli
Restarting NetQ CLI... Success!
Rerun this command if you have multiple premises and want to query a different premises.
Configure Advanced NetQ Agent Settings
A couple of additional options are available for configuring the NetQ Agent. If you are using VRF, you can configure the agent to communicate over a specific VRF. You can also configure the agent to use a particular port.
Configure the NetQ Agent to Use a VRF
While optional, Cumulus strongly recommends that you configure NetQ Agents to communicate with the NetQ Platform only via a VRF, including a management VRF. To do so, you need to specify the VRF name when configuring the NetQ Agent. For example, if the management VRF is configured and you want the agent to communicate with the NetQ Platform over it, configure the agent like this:
root@rhel7:~# sudo netq config add agent server 192.168.1.254 vrf mgmt
root@rhel7:~# sudo netq config restart agent
Configure the NetQ Agent to Communicate over a Specific Port
By default, NetQ uses port 31980 for communication between the NetQ Platform and NetQ Agents. If you want the NetQ Agent to communicate with the NetQ Platform via a different port, you need to specify the port number when configuring the NetQ Agent like this:
root@rhel7:~# sudo netq config add agent server 192.168.1.254 port 7379
root@rhel7:~# sudo netq config restart agent