Install NetQ
The NetQ software contains several components that must be installed, including the NetQ applications, the database, and the NetQ Agents. NetQ can be deployed in two arrangements:
-
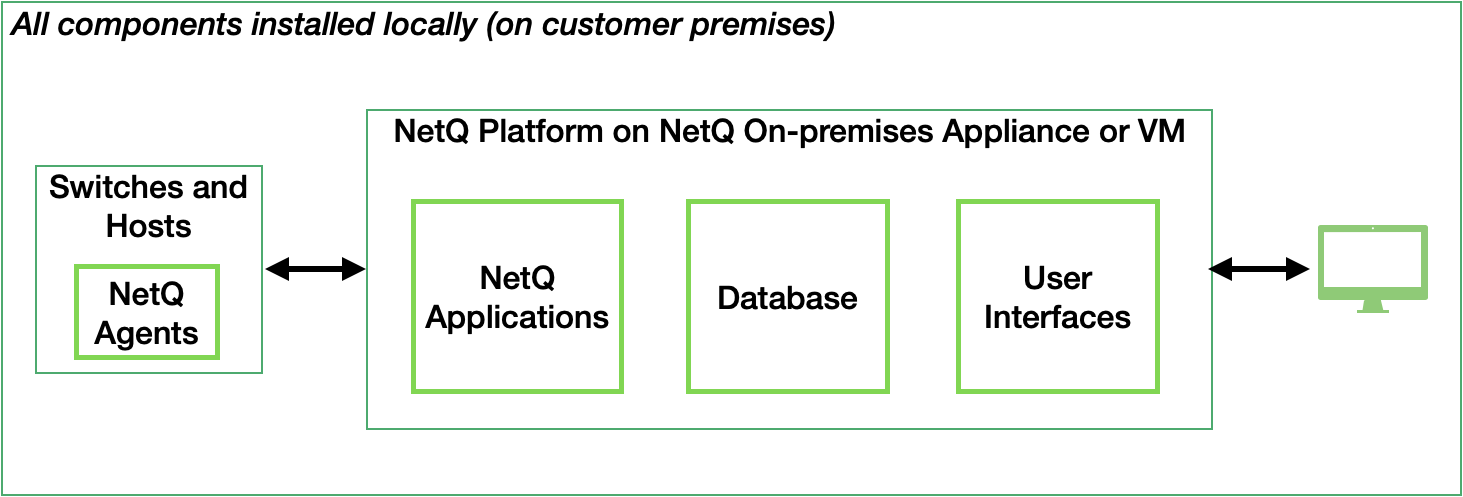
Hosted on premises: This deployment model is used when you want to host a single NetQ site and have it be entirely contained on your premises. In this implementation, all NetQ components including the NetQ Platform software, hardware, and database are located on your premises. The NetQ applications and database are installed as a single entity, called the NetQ Platform, and are run on the NetQ On-premises Appliance or NetQ On-premises Virtual Machine (VM). Note that you are responsible for installing, configuring and maintaining all of the NetQ components. This deployment model is called the on-premises solution in this documentation. It is suitable for organizations with data residency requirements like GDPR (general data protection regulation).
-
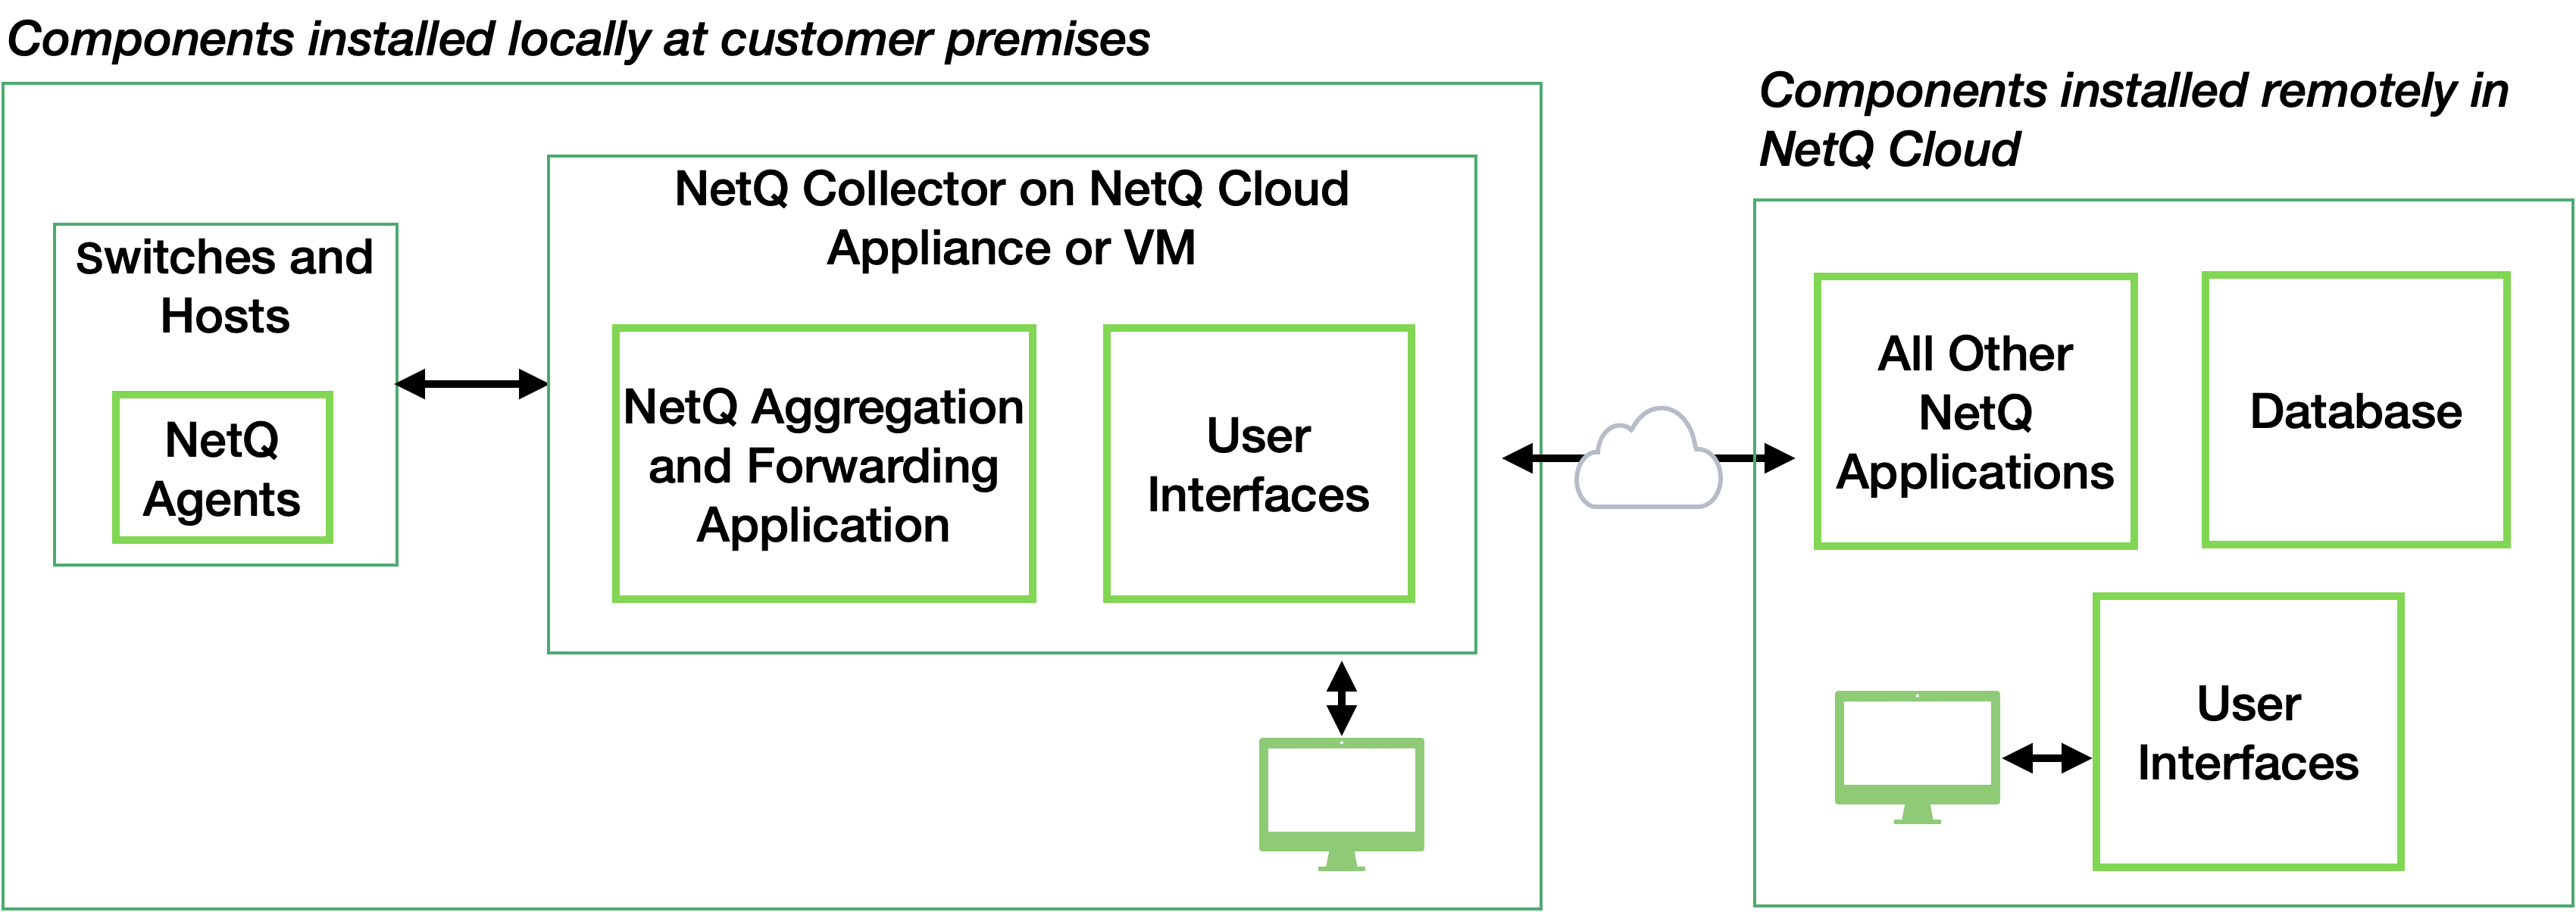
Hosted remotely: This deployment model is used when you want to either set up multiple NetQ premises or use the NetQ Cloud service. In this implementation the NetQ aggregation and forwarding application software, called the NetQ Collector, is installed and run on the NetQ Cloud Appliance or NetQ Cloud VM on premises with a common database and all other applications installed in a single NetQ site or in the NetQ Cloud. In the multi-site implementation, you are responsible for all software, hardware, and the database. In the cloud service implementation, you are responsible for the on-premises NetQ Collector and NVIDIA is responsible for the data storage in the NetQ Cloud. This deployment model is called the remote solution in this documentation.
With either deployment model, the NetQ Agents reside on the switches and hosts being monitored in your network.
NetQ Data Flow
For the on-premises solution, the NetQ Agents collect and transmit data from the switches and hosts back to the NetQ On-premises Appliance or Virtual Machine running the NetQ Platform software, which in turn processes and stores the data in its database. This data is then provided for display through several user interfaces.
For the remote solution, multi-site NetQ implementation, the NetQ Agents at each premises collect and transmit data from the switches and hosts at that premises to its NetQ Cloud Appliance or Virtual Machine running the NetQ Collector software. The NetQ Collectors then transmit this data to the common NetQ Cloud Appliance or Virtual Machine and database at one of your premises for processing and storage.

For the remote solution, cloud service implementation, the NetQ Agents collect and transmit data from the switches and hosts to the NetQ Cloud Appliance or Virtual Machine running the NetQ Collector software. The NetQ Collector then transmits this data to the NVIDIA cloud-based infrastructure for further processing and storage.
For either remote solution, telemetry data is then provided for display through the same user interfaces as the on-premises solution. When using the cloud service implementation of the remote solution, the browser interface can be pointed to the local NetQ Cloud Appliance or VM, or directly to netq.cumulusnetworks.com.
Installation Choices
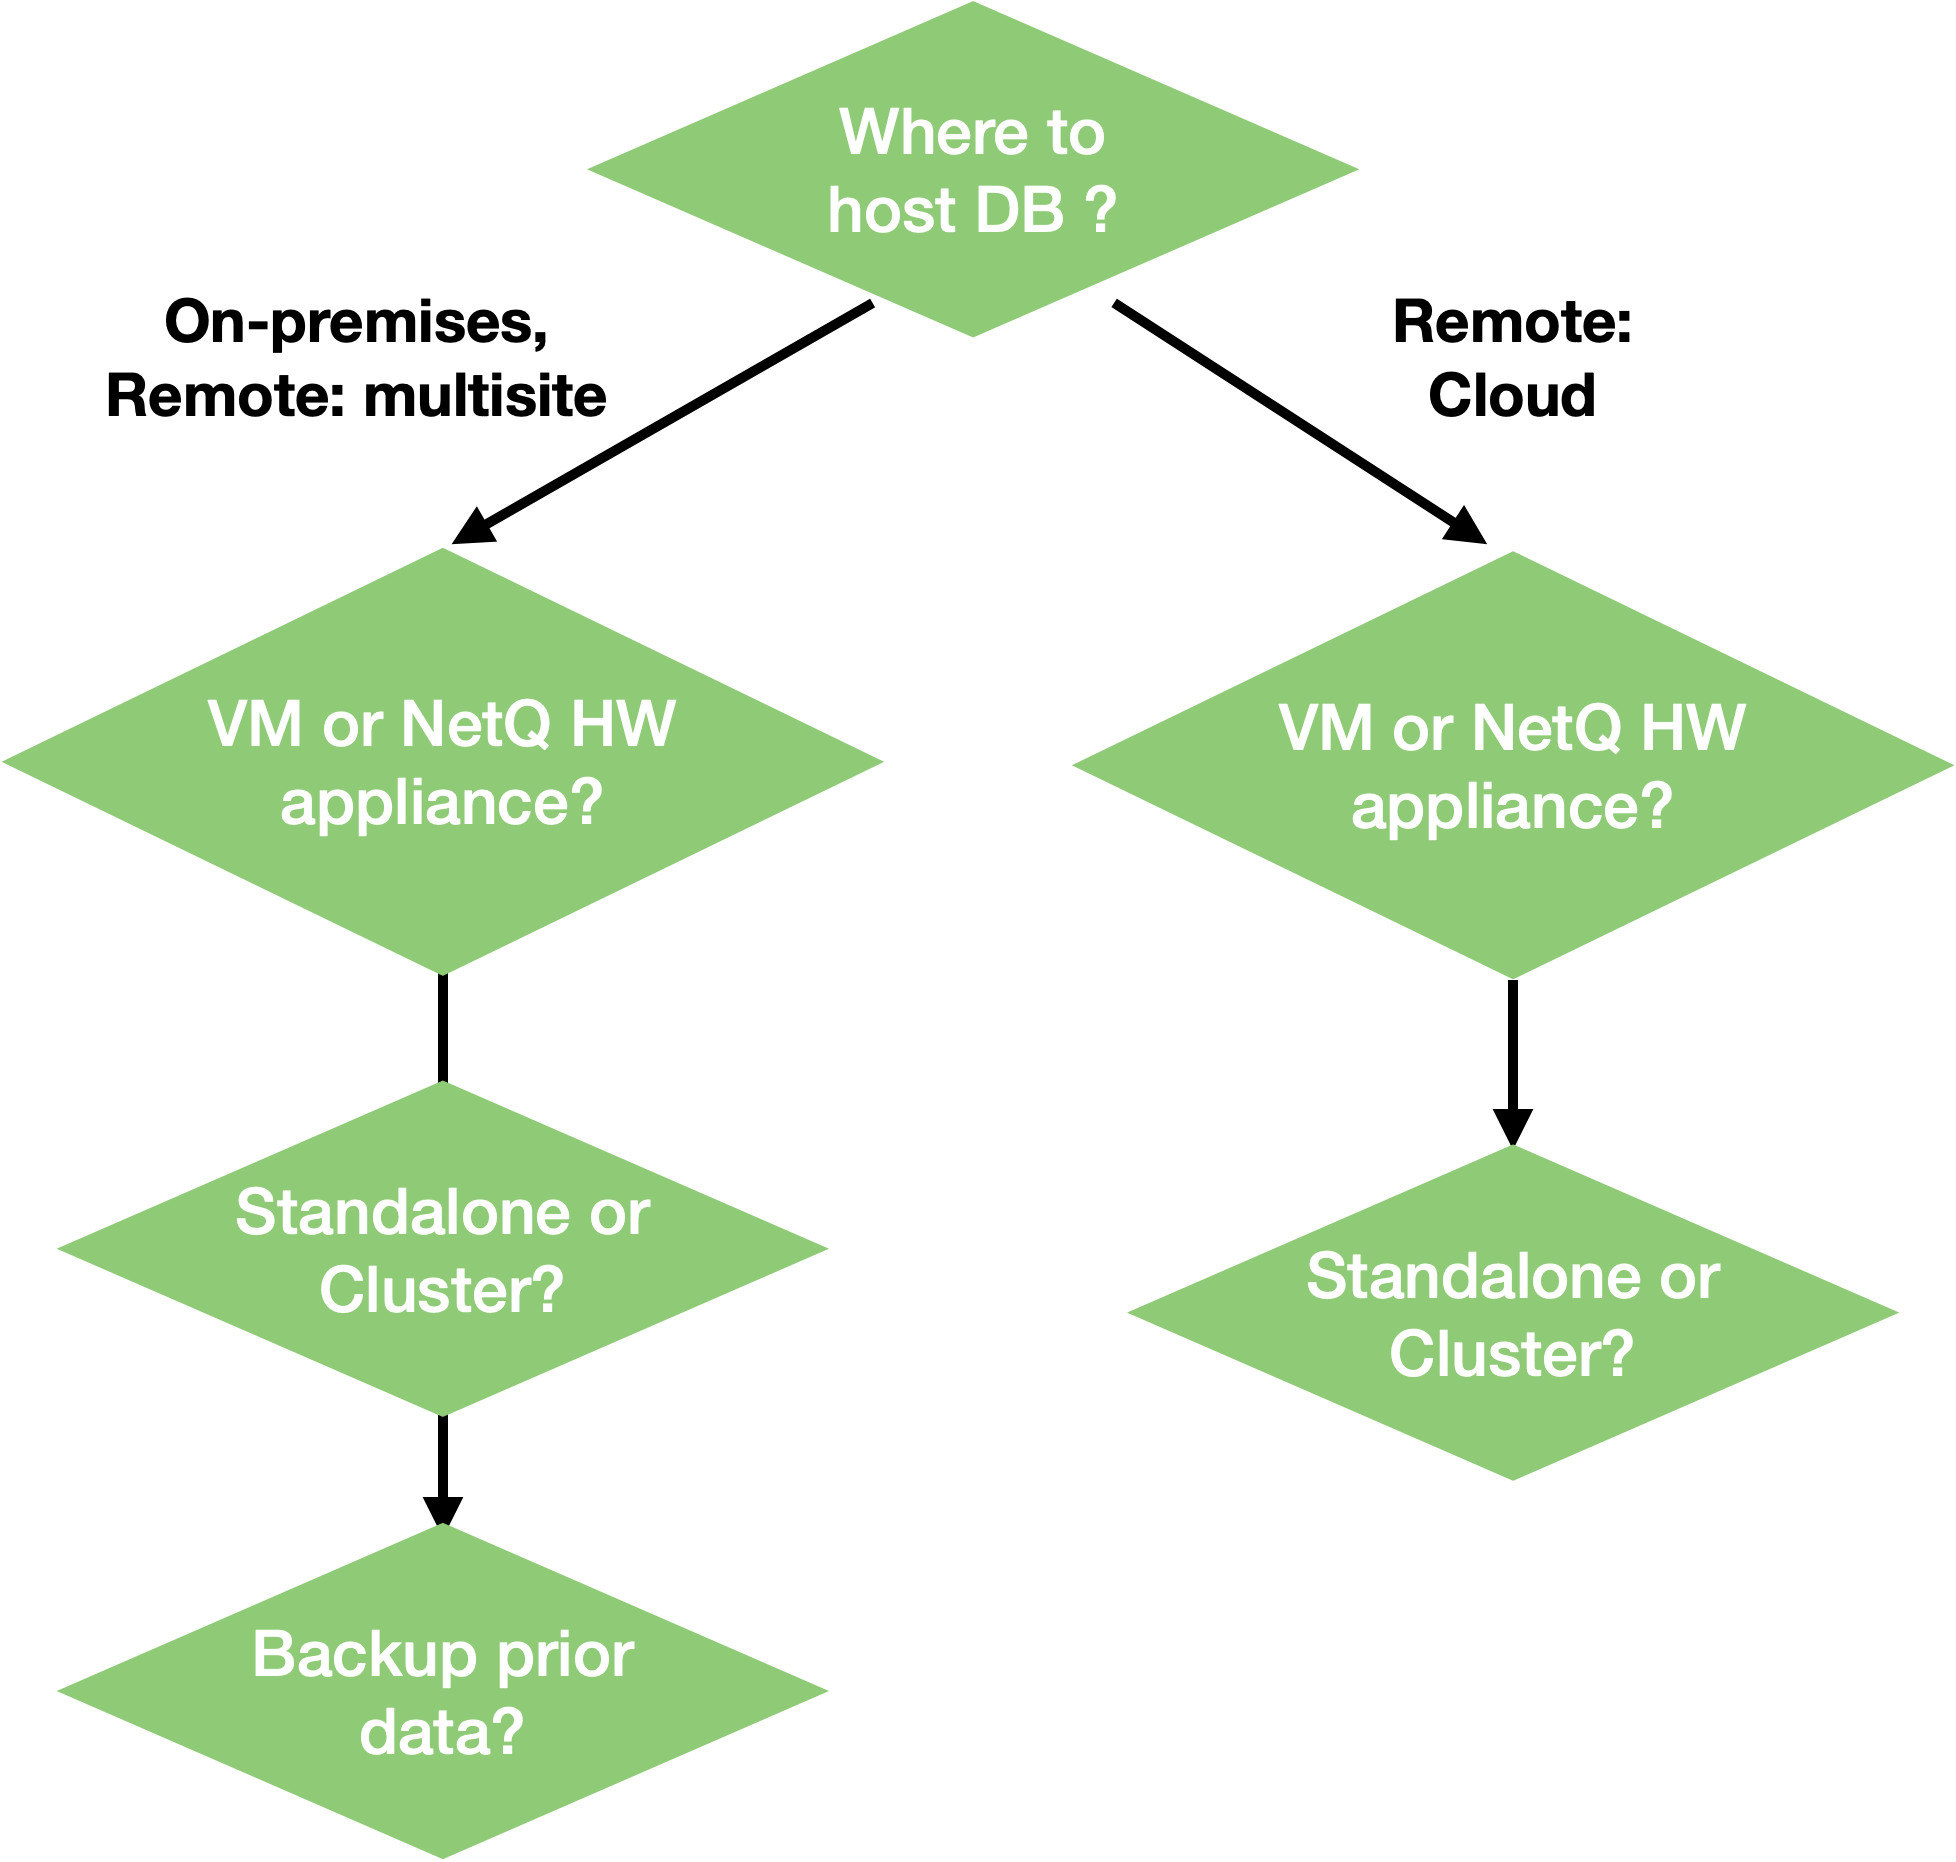
Several choices must be made to determine what steps you need to perform to install the NetQ solution. First and foremost, you must determine whether you intend to deploy the solution fully on your premises or if you intend to deploy the remote solution. Secondly, you must decide whether you are going to deploy a Virtual Machine on your own hardware or use one of the NetQ appliances. Thirdly, you must determine whether you want to install the software on a single server or as a server cluster. Finally, if you have an existing on-premises solution and want to save your existing NetQ data, you must backup that data before installing the new software.
The documentation walks you through these choices and then provides the instructions specific to your selections.
Installation Workflow Summary
No matter how you answer the questions above, the installation workflow can be summarized as follows:
- Prepare physical server or virtual machine.
- Install the software (NetQ Platform or NetQ Collector).
- Install and configure NetQ Agents on switches and hosts.
- Install and configure NetQ CLI on switches and hosts (optional, but useful).
Where to Go Next
Follow the instructions in Install the NetQ System to begin installation of NetQ.