Lifecycle Management
As an administrator, you want to manage the deployment of Cumulus NetQ software onto your network devices (servers, appliances, switches, and hosts) in the most efficient way and with the most information about the process as possible. With this release, NetQ provides the first of many features to enable you to do just that. It includes the ability to take a snapshot of the live network state and configuration before you make changes to your network, take a snapshot after you make those changes, and then compare them.
Create a Network Snapshot
It is simple to capture the state of your network using the snapshot feature.
To create a snapshot:
-
From any workbench, click
 in the workbench header.
 -
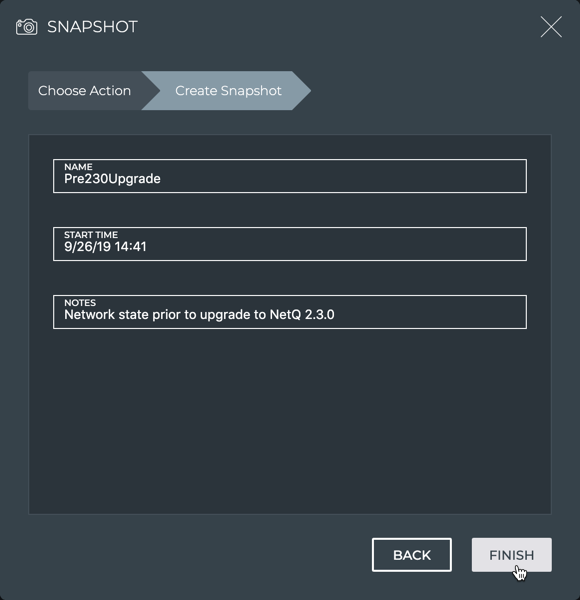
Click Create Snapshot.
-
Enter a name and, optionally, a descriptive note for the snapshot.
-
Click Finish.
A medium Snapshot card appears on your desktop. Spinning arrows are visible while it works. When it finishes you can see the number of items that have been captured, and if any failed. This example shows a successful result.
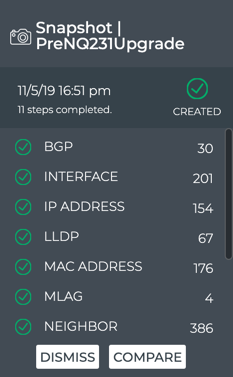
If you change your mind and do not want to create the snapshot, click Back or Choose Action. Do not click Done until you are ready to close the card. Done saves the snapshot automatically.
Compare Network Snapshots
You can compare the state of your network before and after an upgrade or other configuration change to validate the changes.
To compare network snapshots:
-
Create a snapshot (as described in previous section) before you make any changes.
-
Make your changes.
-
Create a second snapshot.
-
Compare the results of the two snapshots:
-
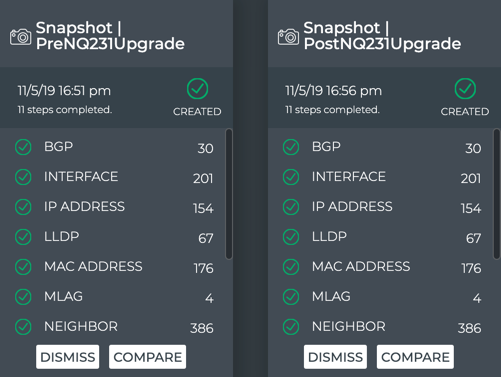
If you have the two desired snapshot cards open:
- Simply put them next to each other to view an overview.
- Scroll down to see all of the items.
-
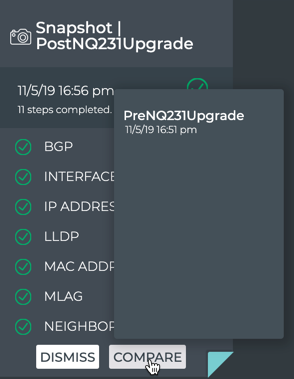
If you have only one of the cards open:
- Click Compare on the open card.
- Select the snapshot to compare with. Note that only snapshots taken before this snapshot appear in the selection list.
-
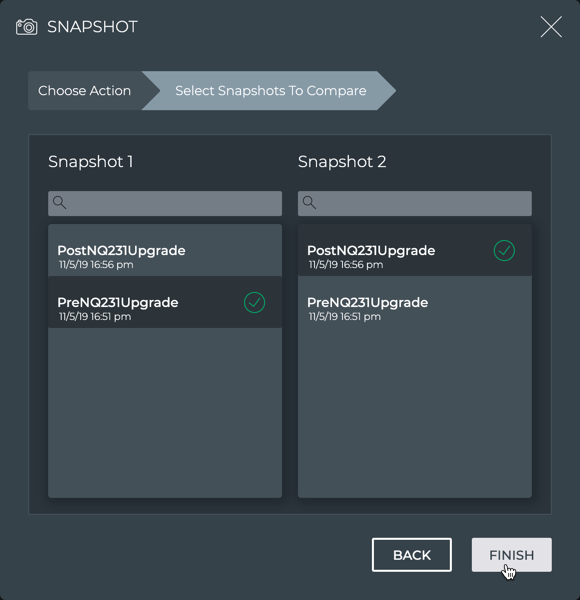
If you have closed one or both of the cards (you may have created them some time before):
- Click .
- Click Compare Snapshots.
- Click on the two snapshots you want to compare.
- Click Finish. Note that two snapshots must be selected before Finish is active.
- Click
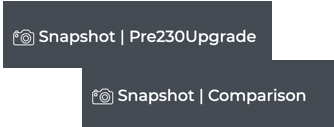
In the latter two cases, the large Snapshot card opens. The only difference is in the card title. If you opened the comparison card from a snapshot on your workbench, the title includes the name of that card. If you open the comparison card through the Snapshot menu, the title is generic, indicating a comparison only. Functionally, you have reached the same point.

-
Interpreting the Comparison Data
For each network element that is compared, count values and changes are shown:
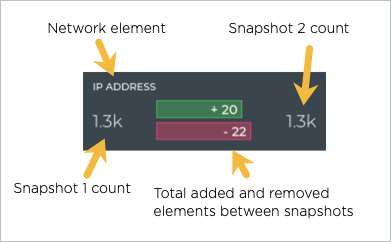
For example, if the snapshot taken first had a total count of 110 interfaces, changes were made that added 40 interfaces and removed 32 interfaces before the second snapshot was taken, the second snapshot total count of interfaces would be eight more than in the first snapshot, or 118.
From this card, you can also change which snapshots to compare. Select an alternate snapshot from one of the two snapshot dropdowns and then click Compare.
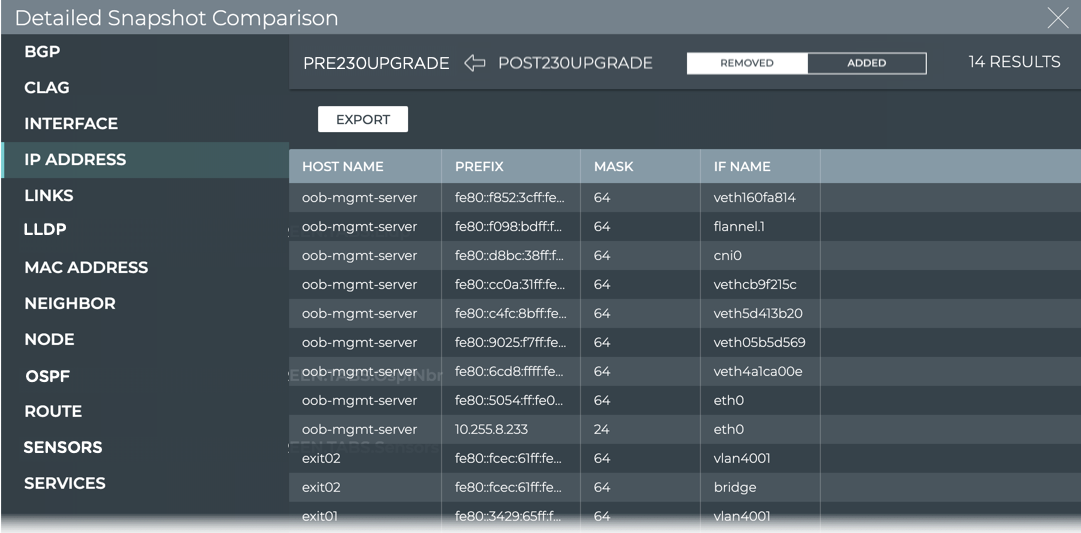
View Change Details
You can view additional details about the changes that have occurred between the two snapshots by clicking View Details. This opens the full screen Detailed Snapshot Comparison card.
From this card you can:
- see each of the elements that was added and removed, and various information about each
- export the results per element
| Element | Data Descriptions |
|---|---|
| BGP |
|
| CLAG |
|
| Interface |
|
| IP Address |
|
| Links |
|
| LLDP |
|
| MAC Address |
|
| Neighbor |
|
| Node |
|
| OSPF |
|
| Route |
|
| Sensors |
|
| Services |
|
Manage Network Snapshots
You can create as many snapshots as you like and view them at any time. When a snapshot becomes old and no longer useful, you can remove it.
To view an existing snapshot:
-
From any workbench, click
in the workbench header. -
Click View/Delete Snapshots.
-
Click View.
-
Click one or more snapshots you want to view, then click Finish.
Click Back or Choose Action to cancel viewing of your selected snapshot(s).
To remove an existing snapshot:
-
From any workbench, click
in the workbench header. -
Click View/Delete Snapshots.
-
Click Delete.
-
Click one or more snapshots you want to remove, then click Finish.
Click Back or Choose Action to cancel the deletion of your selected snapshot(s).