Configuration Updates
After installation or upgrade of NetQ is complete, there are a few additional configuration tasks that might be required.
Add More Nodes to Your Server Cluster
Installation of NetQ with a server cluster sets up the master and two worker nodes. To expand your cluster to include up to a total of nine worker nodes, use the Admin UI.
To add more worker nodes:
-
Prepare the nodes. Refer to the relevant server cluster instructions in Prepare for NetQ Cloud Installation.
-
Open the Admin UI by entering
https://<master-hostname-or-ipaddress>:8443in your browser address field.This opens the Health dashboard for NetQ.
-
Click Cluster to view your current configuration.
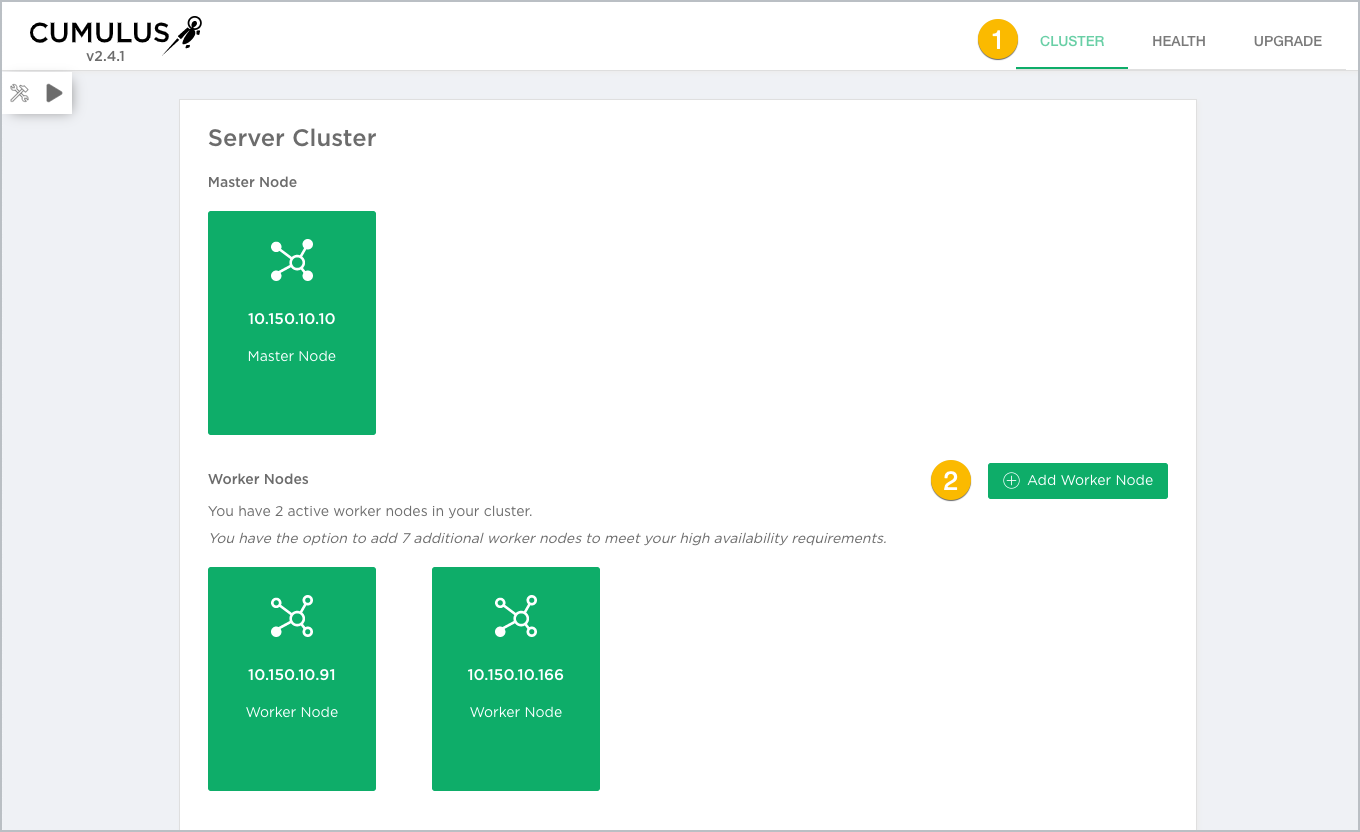
This opens the Cluster dashboard, with the details about each node in the cluster.
-
Click Add Worker Node.
-
Enter the private IP address of the node you want to add.
-
Click Add.
Monitor the progress of the three jobs by clicking
 next to the jobs.
On completion, a card for the new node is added to the Cluster dashboard.
If the addition fails for any reason, download the log file by clicking
 , run
, run netq bootstrap reset, and then try again. -
Repeat this process to add more worker nodes as needed.
Update Your Cloud Activation Key
The cloud activation key is the one used to access the Cloud services, not the authorization keys used for configuring the CLI. It is provided by Cumulus Networks when your premises is set up. It is called the config-key.
There are occasions where you might want to update your cloud service activation key. For example, if you mistyped the key during installation and now your existing key does not work, or you received a new key for your premises from Cumulus Networks.
To update the activation key, run the following command on your NetQ Platform replacing text-opta-key with your new key.
cumulus@switch:~$ netq install opta activate-job config-key <text-opta-key>